Adjustments and effects
This chapter covers colour and tone changes, filters, the Colour Tools window, the intelligent editing tools, image resizing, and flattening. These are the commands that change how a picture looks rather than adding new paint.
The Adjust tab
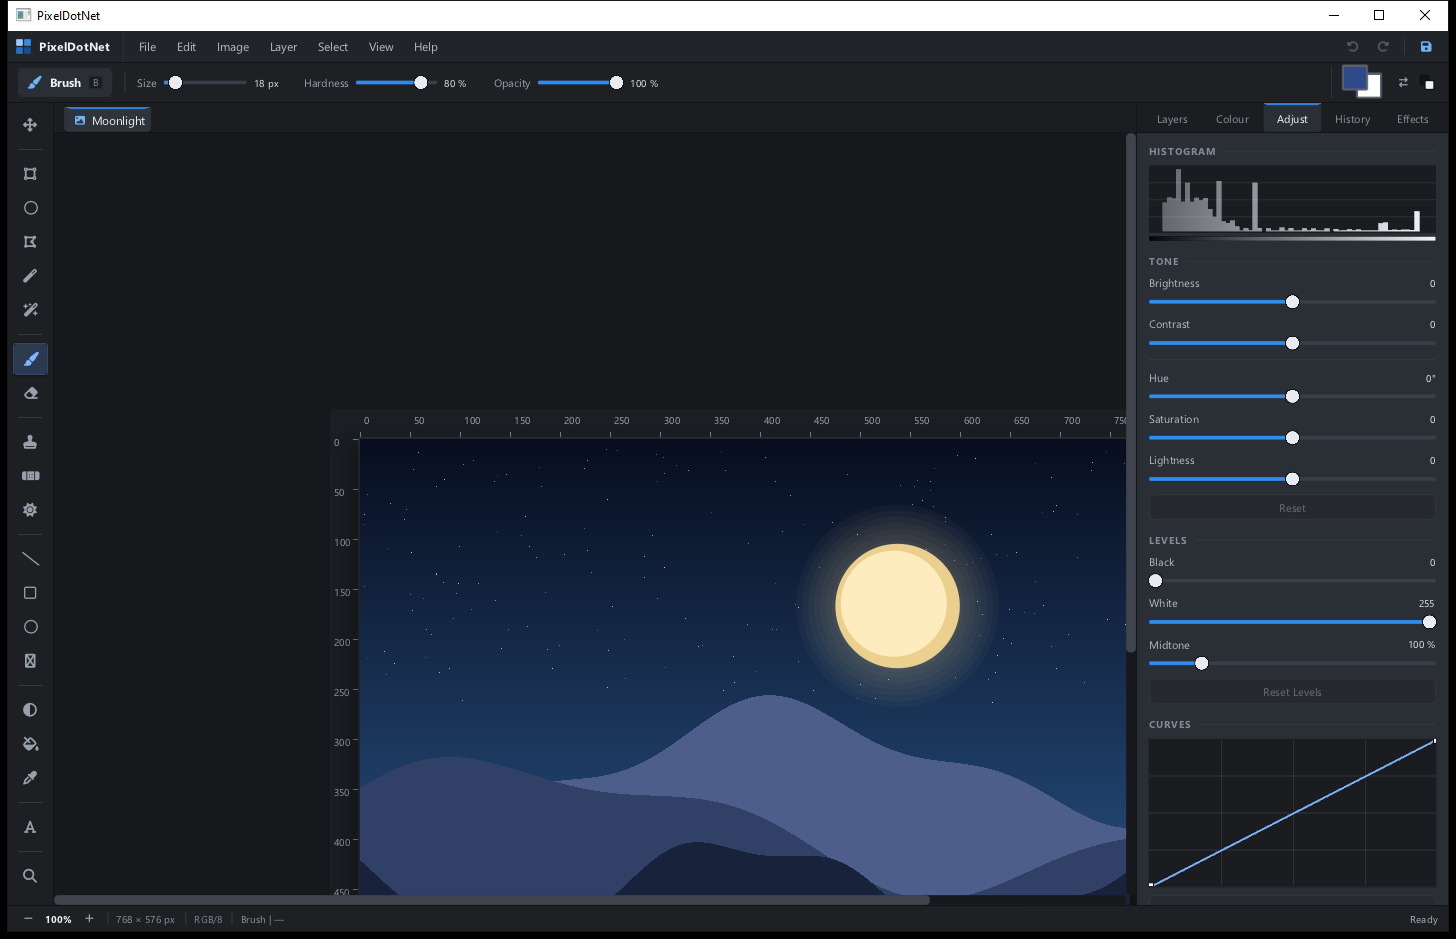
Open the Adjust tab on the right. It contains live sliders for brightness, contrast, hue, saturation, and lightness, plus Levels and Curves.
All of these controls preview on the active layer, or only inside the selection if one exists. They always rebuild from the pixels captured before the adjustment, so moving a slider back and forth does not slowly damage the image.
- Brightness makes the image lighter or darker.
- Contrast pushes lights and darks apart or brings them together.
- Hue rotates all colours around the colour wheel.
- Saturation makes colours stronger or more muted.
- Lightness moves the overall tone without changing hue.
Apply keeps the result as one undo step. Reset restores the original pixels.
Levels and Curves
Levels
Levels set a black point, a white point, and a midtone gamma. This is the fastest way to fix a picture that looks washed out or too dark.
- Black makes everything below this value pure black.
- White makes everything above this value pure white.
- Midtone brightens or darkens the values in between.
Move the black slider up until the darkest useful shadows just touch black, and move the white slider down until the brightest highlights just touch white.
Curves
Curves map an input tone to an output tone. The horizontal axis is the original tone and the vertical axis is the new tone. A straight line from bottom left to top right changes nothing.
- Click the curve to add a point.
- Drag a point up to brighten that tone, or down to darken it.
- Drag a point far to the side to change contrast in that range.
- Drag a point out of the graph to remove it.
- Use Reset Curve to return to the straight line.
Adjustment layers
A normal adjustment changes pixels. An adjustment layer is different: it sits above the layers below and changes how they look without altering their pixels. You can hide it, fade it, reorder it, or delete it at any time.
- Select the layer above which the adjustment should sit.
- In the Adjust tab, click Levels Layer or Curves Layer.
- A new adjustment layer appears in the Layers panel.
- Select the adjustment layer to edit its sliders.
- Use its mask or a selection to limit where the adjustment applies.
Adjustment layers affect every visible layer below them in the same group or stack. Move one down if it should affect fewer layers. They are saved in project files.
The Effects tab
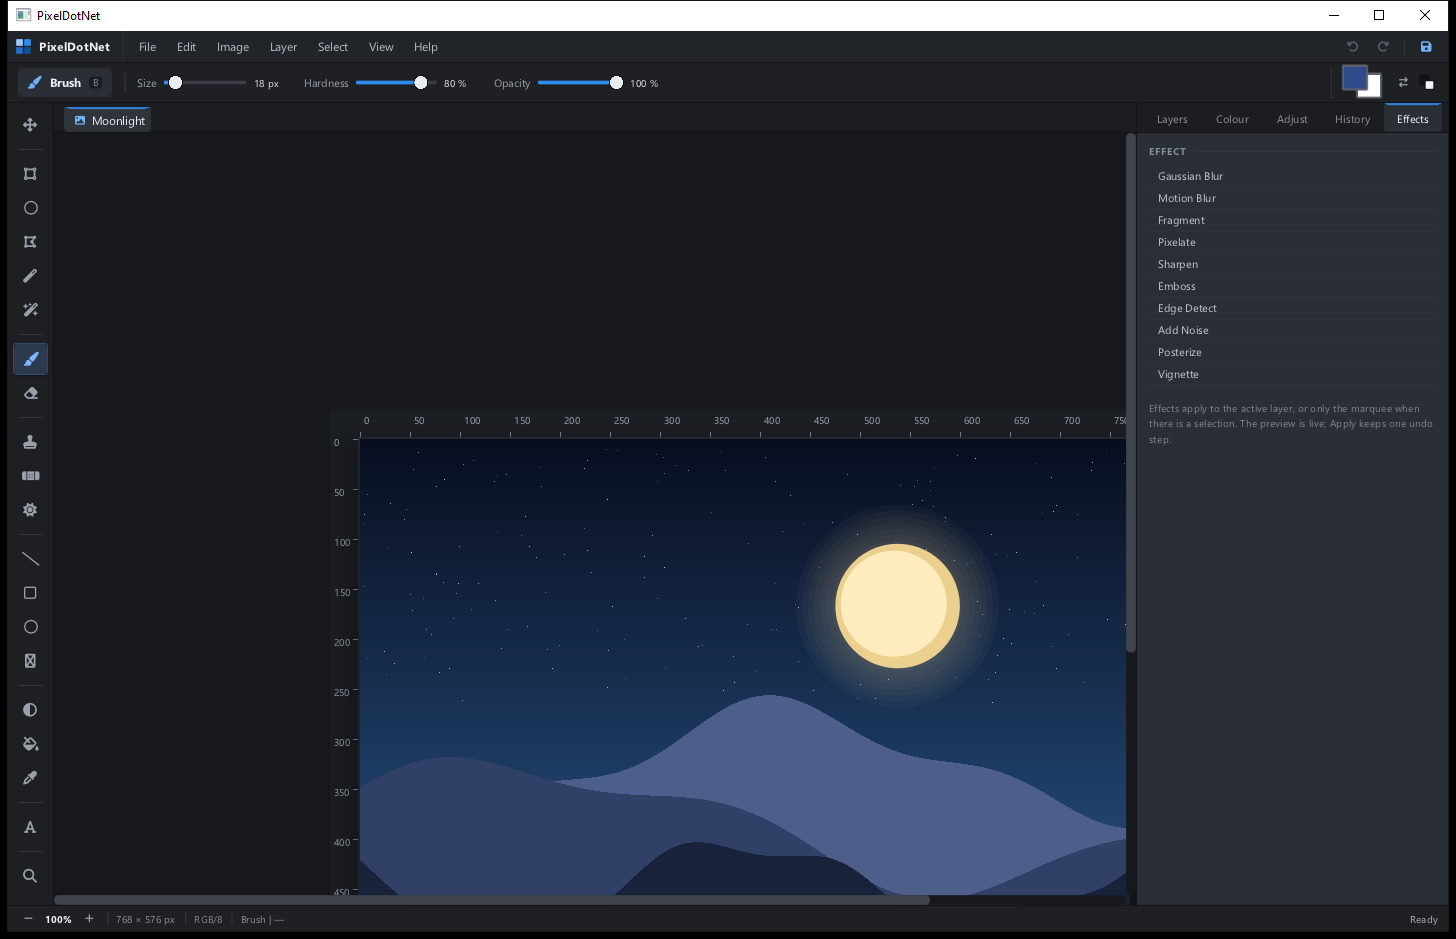
Open the Effects tab on the right. Pick an effect and drag the amount slider. The preview is live, and Apply bakes the result into the active layer or selection. Cancel restores the original pixels.
| Effect | What it does |
|---|---|
| Gaussian Blur | Softens the image evenly. Good for depth and focus. |
| Motion Blur | Smears pixels horizontally, like movement. |
| Fragment | Creates a soft, offset echo. |
| Pixelate | Turns the image into square blocks. |
| Sharpen | Increases local contrast along edges. |
| Emboss | Turns edges into a raised grey relief. |
| Edge Detect | Draws glowing edges on black. |
| Add Noise | Adds film grain. |
| Posterize | Reduces each colour channel to a few steps. |
| Vignette | Darkens the corners of the layer. |
Effects respect the selection. If you want an effect only on a face, select the face first. If you want to keep the original, duplicate the layer before applying.
Colour Tools
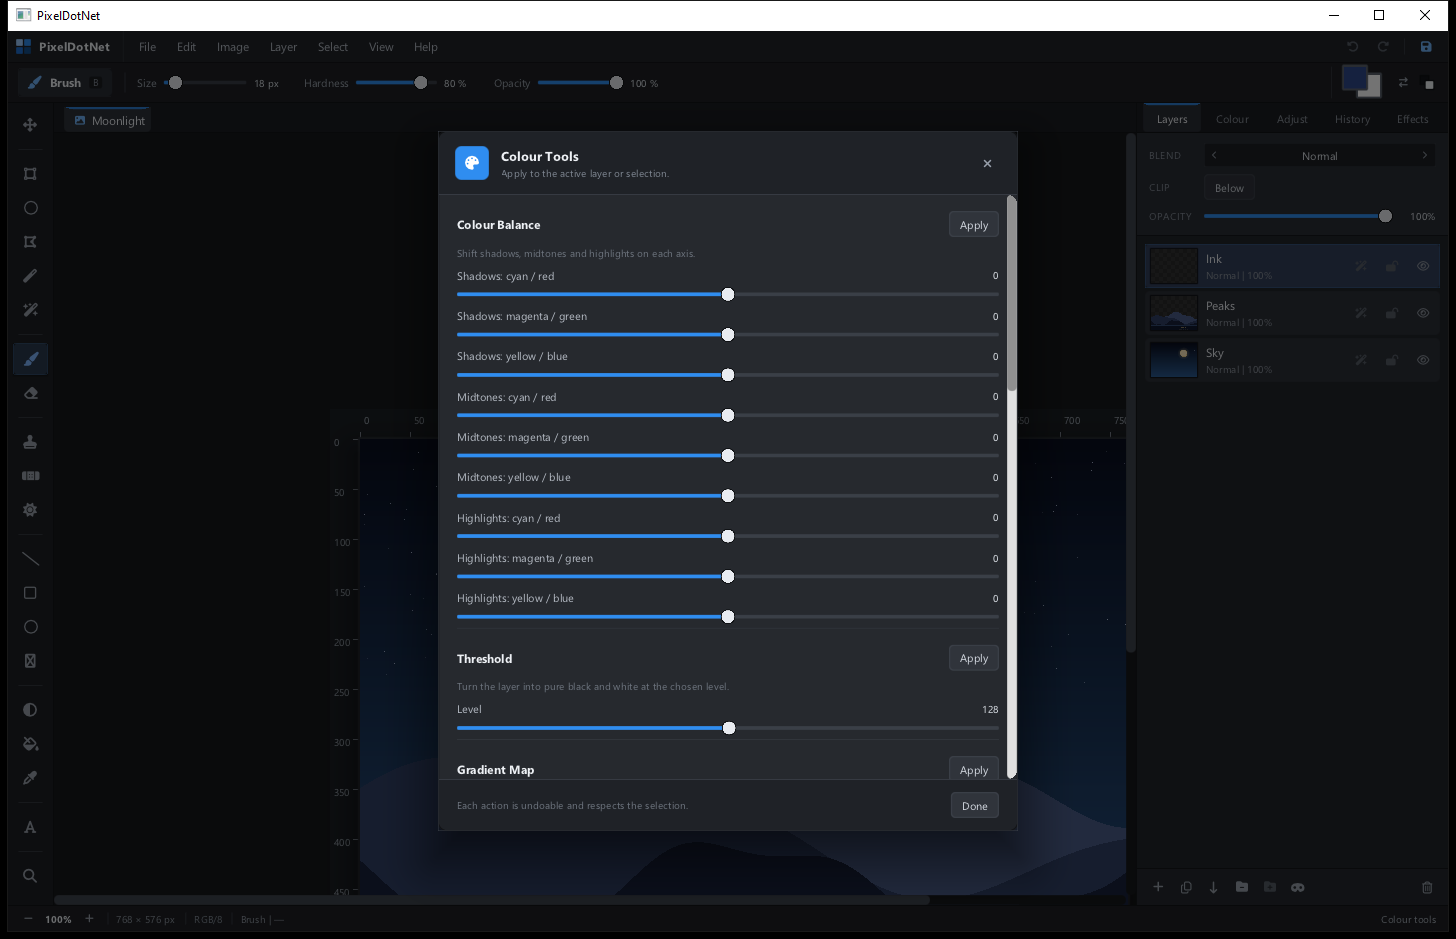
Choose Image > Colour Tools... to open one scrollable window with eight colour operations. Each section has its own Apply button, so you can use them in any order. Every action is undoable and respects the selection.
Colour Balance
Shift the colours of the shadows, midtones, and highlights separately. Each row is an axis: cyan to red, magenta to green, yellow to blue. Small changes are usually enough.
Threshold
Turn the layer into pure black and white. The Level slider decides where the cut-off sits. Low values keep more black. High values keep more white.
Gradient Map
Map the brightness of the image between two colours. Dark pixels take the Dark colour and bright pixels take the Light colour. This is a quick way to make duotone posters.
Replace Colour
Choose a From colour and a To colour. Every pixel close to the From colour becomes the To colour. Tolerance widens the match. Use a low tolerance for a precise colour and a higher one for a range.
Red-Eye Removal
Select the eye with an elliptical selection, then raise the Strength slider and apply. The tool neutralises red pupils inside the selection while leaving the rest of the eye alone.
Channel Mixer
Each output channel becomes a weighted mix of the source red, green, and blue channels. This is an advanced tool for colour grading and black and white conversions. Use Reset to return to the identity mix.
Selective Colour
Pick a colour range, then shift its cyan, magenta, yellow, or black amount. Use it to make reds warmer, skies deeper, or skin tones more even. Each range has its own reset.
Split Channels
Click Split to create three greyscale layers above the active layer, one for red, one for green, and one for blue. This is useful for advanced channel work or for seeing how much each colour contributes.
Perspective, Mesh Warp, Content-Aware Fill
Perspective Transform
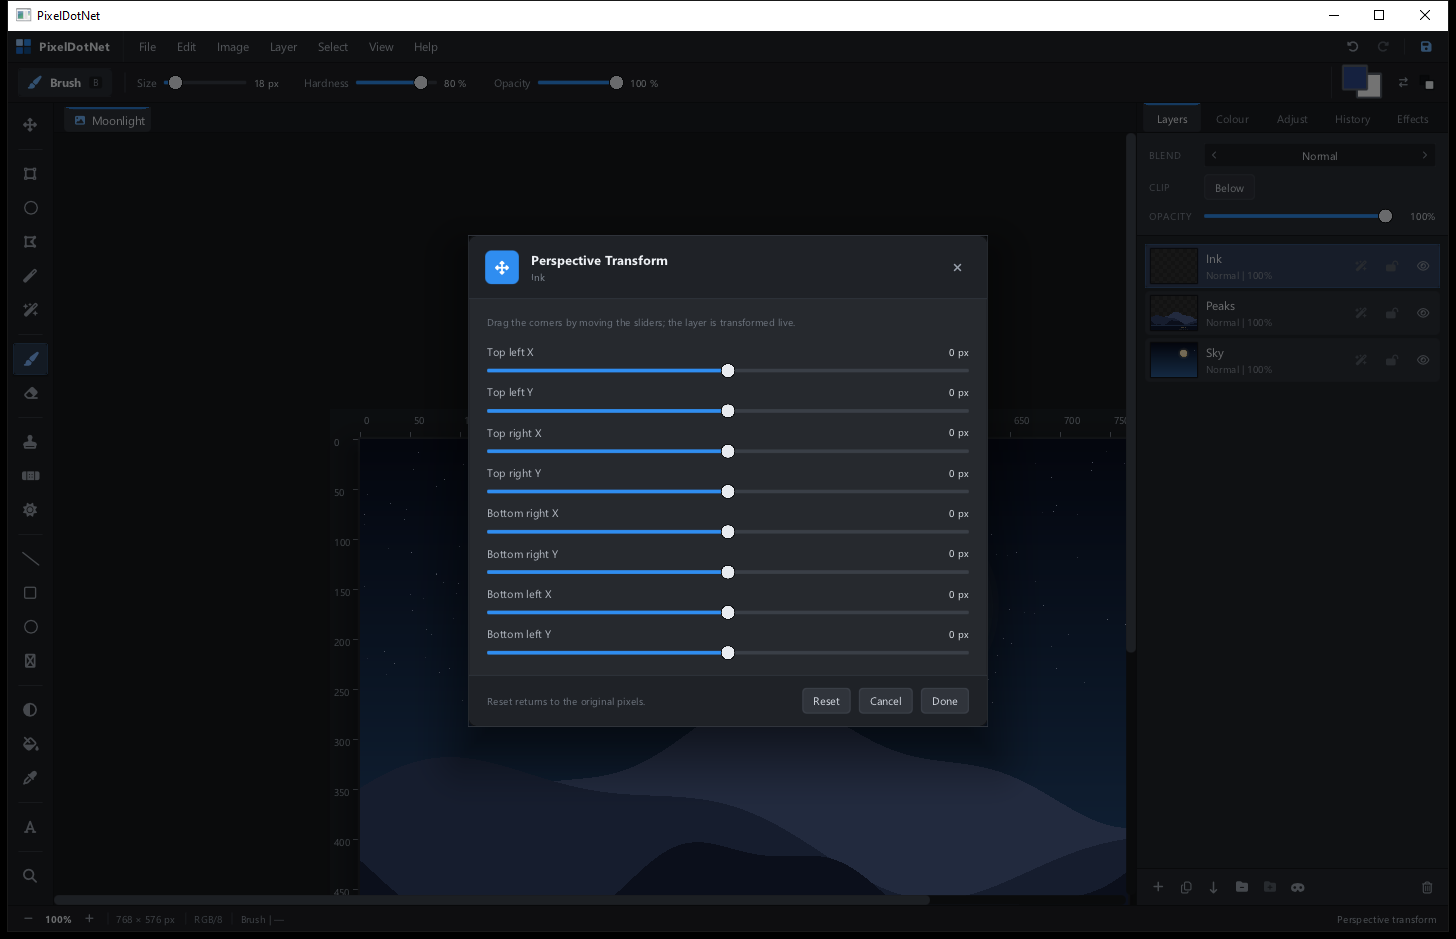
Choose Edit > Perspective Transform.... The dialog has eight sliders, one pair for each corner of the layer or selection. Move a corner in or out to tilt that side, as if you were adjusting a photo of a building or a poster.
- Top left X and Top left Y move the top left corner.
- The other three corner pairs work the same way.
- Reset clears all corner offsets.
- Cancel restores the original pixels.
- Done keeps the transformed layer.
The transform previews live. It works on the active layer, or only inside the selection when one exists.
Mesh Warp
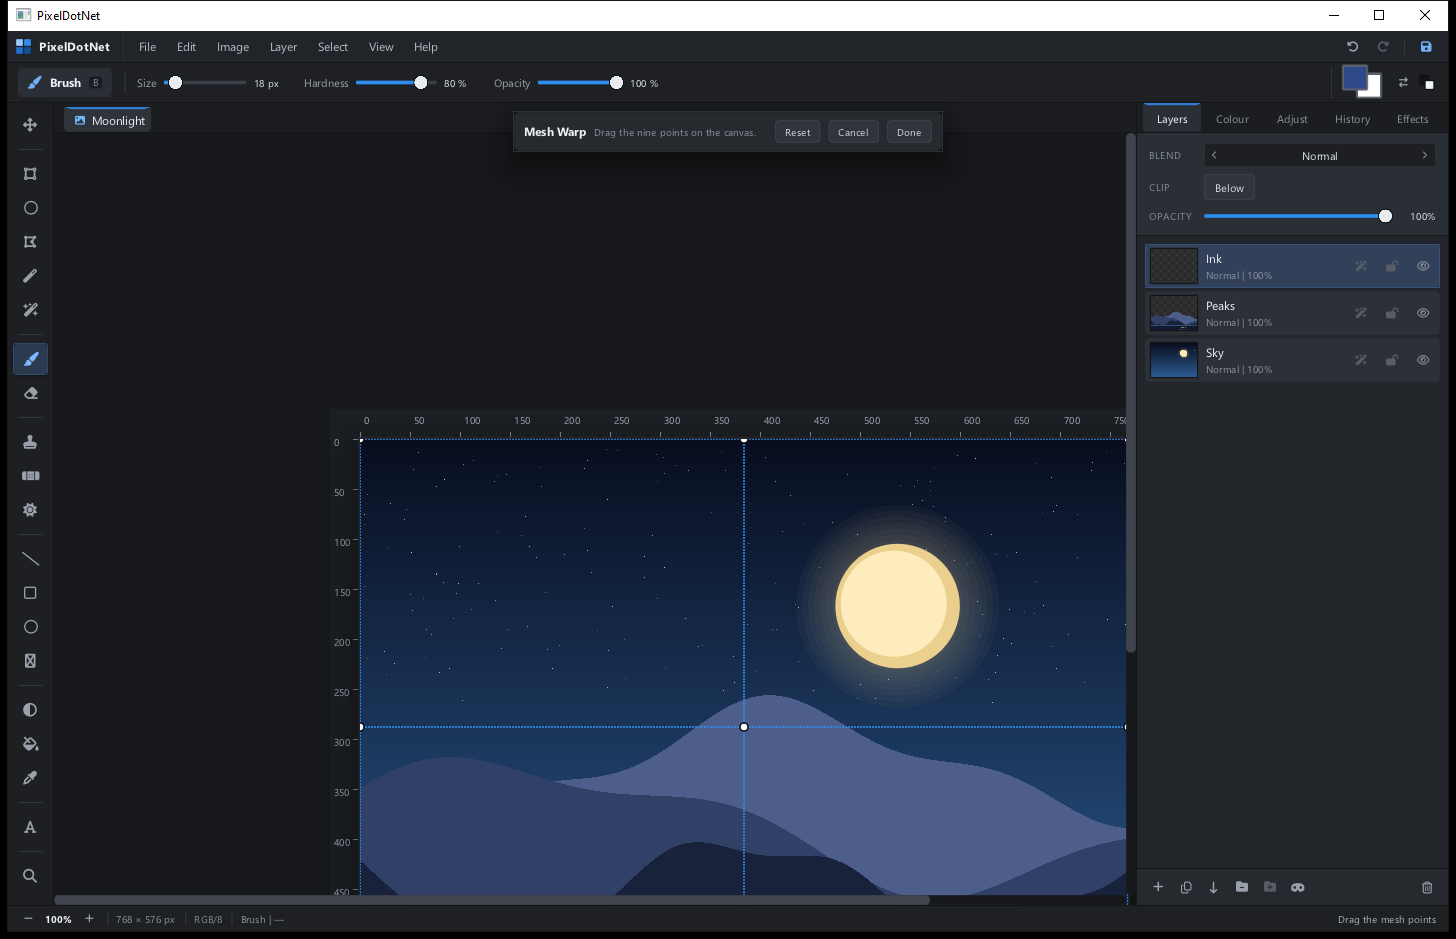
Choose Edit > Mesh Warp.... A three by three grid of control points appears on the canvas. Drag any point to bend the layer or selection around it.
- Reset clears every point offset.
- Cancel restores the original pixels.
- Done keeps the warped result.
Mesh Warp is good for small corrections, such as straightening a smile or reshaping a logo. Large moves stretch the pixels, so use them with care.
Content-Aware Fill
Select something you want to remove, then choose Edit > Content-Aware Fill. The program fills the selected area with reconstructed texture and colour from around it. It works best on small objects against fairly even backgrounds, such as a bird in the sky or a sign on a wall.
Red-eye removal
The dedicated Red-Eye tool lives inside Colour Tools. Select the pupil with the elliptical selection, set the strength, and apply. The tool looks for red pixels inside the selection and neutralises them. If the result is too strong, undo and try a lower strength.
Invert, Desaturate, and Flip
- Image > Invert or Ctrl+I flips every colour channel. This makes a negative.
- Image > Desaturate or Ctrl+Shift+U removes colour while keeping brightness. It is different from lowering saturation because it produces a true grey.
- Image > Flip Horizontal and Flip Vertical mirror the active layer or selection bounds.
Image Size and Canvas Size
Image Size
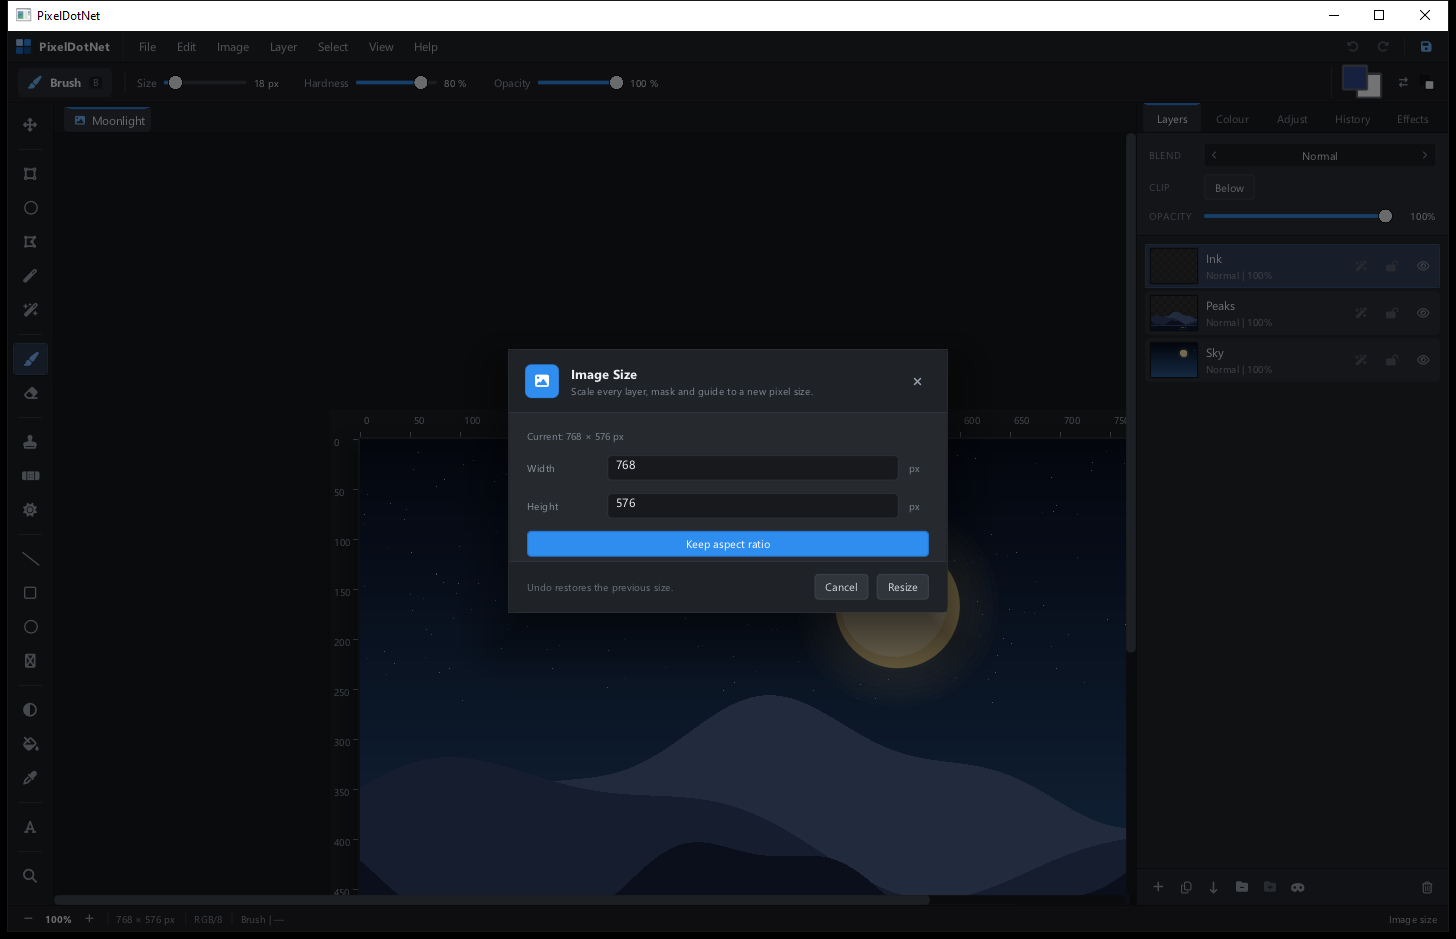
Image > Image Size... scales the artwork itself. All layers, masks, guides, shape layers, and text layers are scaled to the new size. Smart objects and vector layers are rasterised during this operation so the result matches the preview exactly.
- Enter a new width and height in pixels.
- The resize is one undoable step.
- Scaling up cannot invent detail. Work at the final size when you can.
Canvas Size
Image > Canvas Size... changes the document bounds without stretching the artwork. Extra space is transparent. Use the anchor buttons to decide which side keeps the existing content in place. This is how you add room for a border or move the composition inside a larger frame.
Flattening
Image > Flatten Image combines every visible layer into one. Use it only when you are finished with the layer stack, because hidden layers are discarded and the result is much harder to edit. Save a project copy first if there is any chance you will want the layers back.
History
The History tab shows the undo timeline for the current document. Each committed action is a step. Click an older step to jump back to that point. Click a newer step to move forward again.
- The list keeps the most recent steps. When it is full, the oldest step falls off.
- Live previews, such as a slider drag, are not added as separate steps until you commit them.
- Ctrl+Z undoes one step. Ctrl+Y redoes.