Files and export
This chapter covers documents, tabs, the in-app file browser, image formats, layered project files, batch processing, and SVG import and export. It also explains which format to choose for which job.
New documents
Use File > New Document for a blank canvas. The normal size is 768 by 576 pixels. File > New Small Document creates a 480 by 360 canvas, which is handy for quick tests.
The new document starts with one layer, ready for painting. Use Image > Canvas Size later if you need a different shape.
File > Open Sample reloads the built-in Moonlight image. It is a safe place to experiment because you can always reload it.
Tabs and multiple documents
Each open image appears as a tab above the canvas. Click a tab to switch documents. Each tab keeps its own layers, selection, zoom, and undo history.
- File > Next Document or Ctrl+Tab moves to the next tab.
- File > Previous Document or Ctrl+Shift+Tab moves back.
- File > Close Document or Ctrl+W closes the active tab. The last tab cannot be closed.
When you save an image or a project, the tab name changes to the saved file name. That makes it easy to see which tab belongs to which file.
The file browser
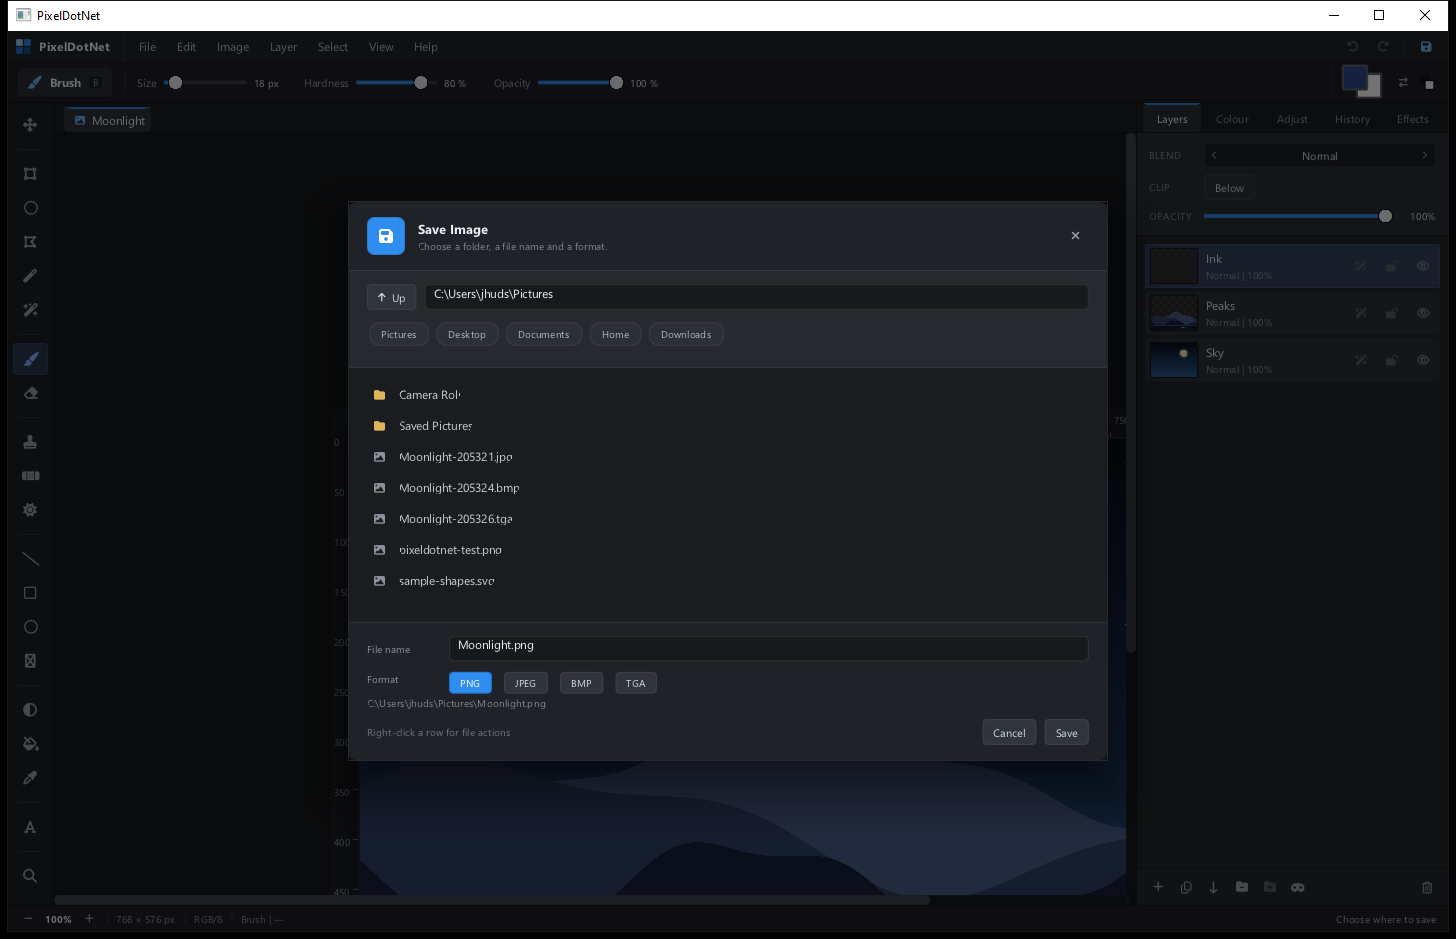
PixelDotNet uses its own file browser instead of the system dialog. The browser has a folder list on the left, file rows in the middle, and a name field and action buttons at the bottom.
- Click a folder to open it. Use the parent row to go up one level.
- Double-click a file to open it, or select it and press the open button.
- Click a shortcut on the left to jump to a common place such as Pictures or the current project folder.
- Right-click a file row to rename, copy, cut, paste, or delete it.
- Use the new folder button to create a folder without leaving the app.
- The file name field at the bottom shows the name that will be saved.
.pxd projects and SVG files when the matching command is open.
Saving an image
Choose File > Save... or press Ctrl+S. The browser opens in save mode.
- Choose the destination folder.
- Type a file name. The extension is added automatically.
- Pick PNG, JPEG, BMP, or TGA from the format buttons.
- Press the save button.
The saved image is the visible composite. Transparent areas stay transparent in PNG and TGA. JPEG does not support transparency, so transparent areas become white.
Image formats
| Format | Transparency | Best use | Watch out for |
|---|---|---|---|
| PNG | Yes | Artwork, screenshots, pixel art, anything with transparency | Larger files than JPEG for photos |
| JPEG | No | Photos and sharing | Loses a little quality each time you save |
| BMP | No | Simple uncompressed images | Very large files |
| TGA | Yes | Game textures and simple alpha images | Less common for everyday sharing |
| PXD | Yes | Editable layered projects | Only PixelDotNet can open it |
| SVG | Yes | Scalable shapes and text | Raster layers are embedded as one PNG |
Project files
A project file uses the .pxd extension. It keeps the whole working document, not just the final picture.
A project stores:
- Every layer and its pixels
- Layer names, order, visibility, opacity, and blend modes
- Layer masks and clipping settings
- Groups and their visibility and opacity
- Layer styles
- Smart objects and their transforms
- Shape layers, path nodes, and text layers
- Guides
- The active layer
Use File > Save Project... and File > Open Project.... Project files are compressed, so they are usually smaller than you might expect.
Batch processing
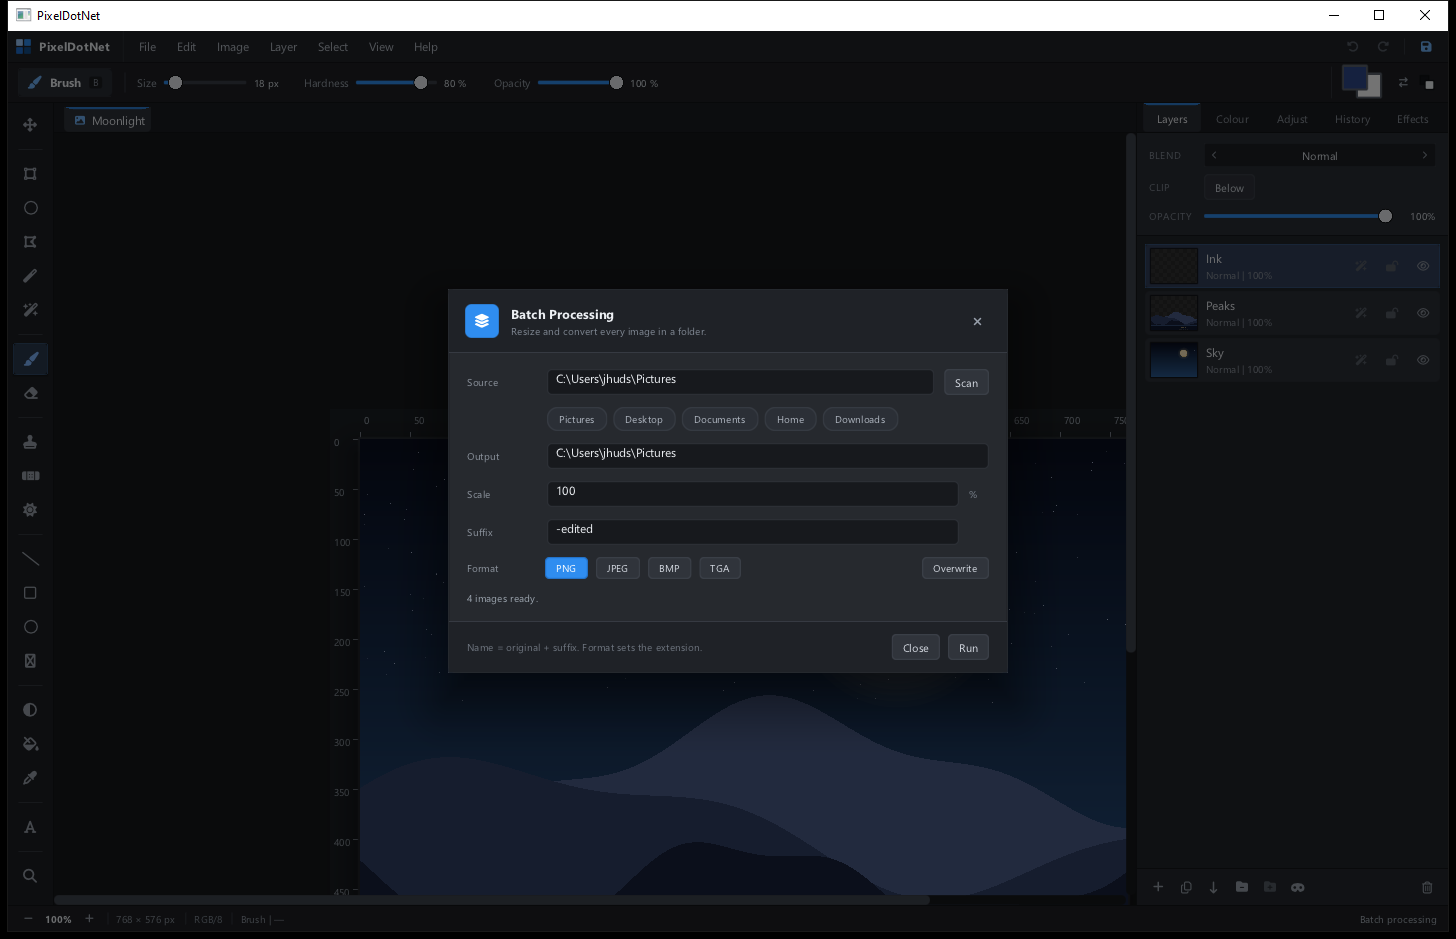
File > Batch Process... resizes and converts every supported image in a folder. It is useful for making thumbnails, preparing a web gallery, or converting a folder of PNGs to JPEG.
- Source. Type or paste the folder that contains the images. Press Enter to confirm, then click Scan to count the files.
- Output. Type or paste the folder where the new files should go. It can be the same folder if you turn on Overwrite, but a separate output folder is safer.
- Scale. Enter a percentage. 100 keeps the original size. 50 makes every image half as wide and half as tall.
- Suffix. Add text to each output name, such as
-webor-small. The original name is kept and the suffix is added. - Format. Choose PNG, JPEG, BMP, or TGA.
- Overwrite. Turn this on only if you are happy to replace existing files with the same name.
- Run. The status line reports how many files were written.
Batch processing never opens the images in tabs. It works directly from the source folder to the output folder.
SVG import and export
SVG is a vector file format. Vector shapes are described by geometry rather than a fixed pixel grid, so they can be scaled without becoming blurry. PixelDotNet supports a practical subset of SVG.
Importing SVG
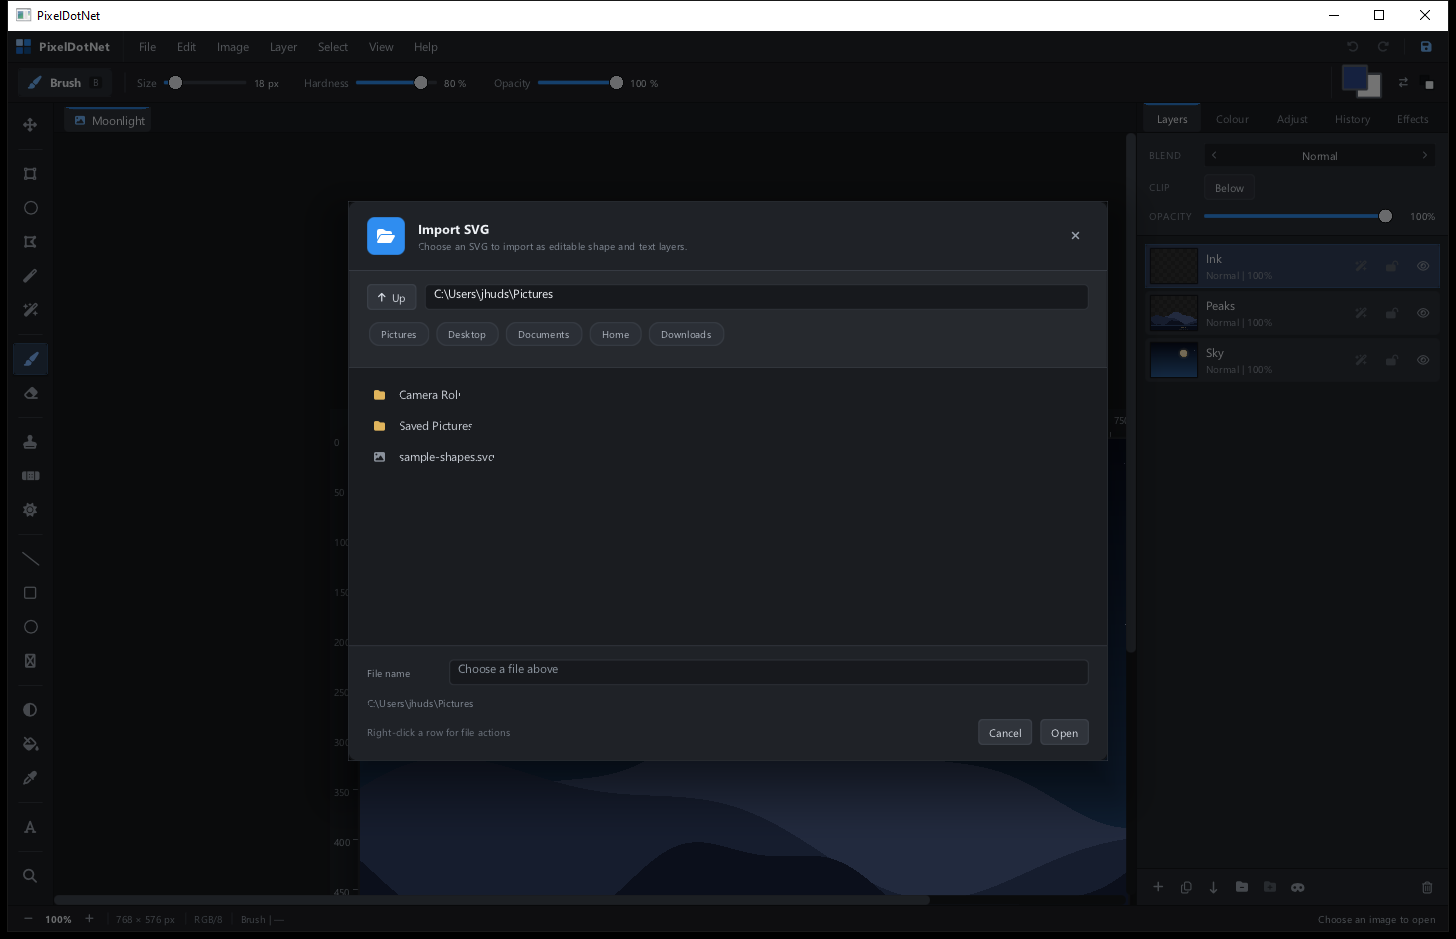
Choose File > Import SVG..., or open an SVG through the normal Open dialog. Each imported primitive becomes a layer.
Supported elements and features:
rect,circle,ellipse,line,polyline, andpolygonpathwith move, line, horizontal, vertical, cubic, smooth cubic, quadratic, smooth quadratic, and close commands- Groups and nested transforms such as translate, scale, rotate, skew, and matrix
- Fill and stroke colours, opacity, fill opacity, stroke opacity, and stroke width
- Basic
textandtextPathelements - Embedded base64 images
Axis-aligned rectangles and ellipses stay as editable shape layers. Rotated shapes become editable path layers. Imported text becomes an editable text layer. Arc commands are currently imported as straight segments.
Exporting SVG
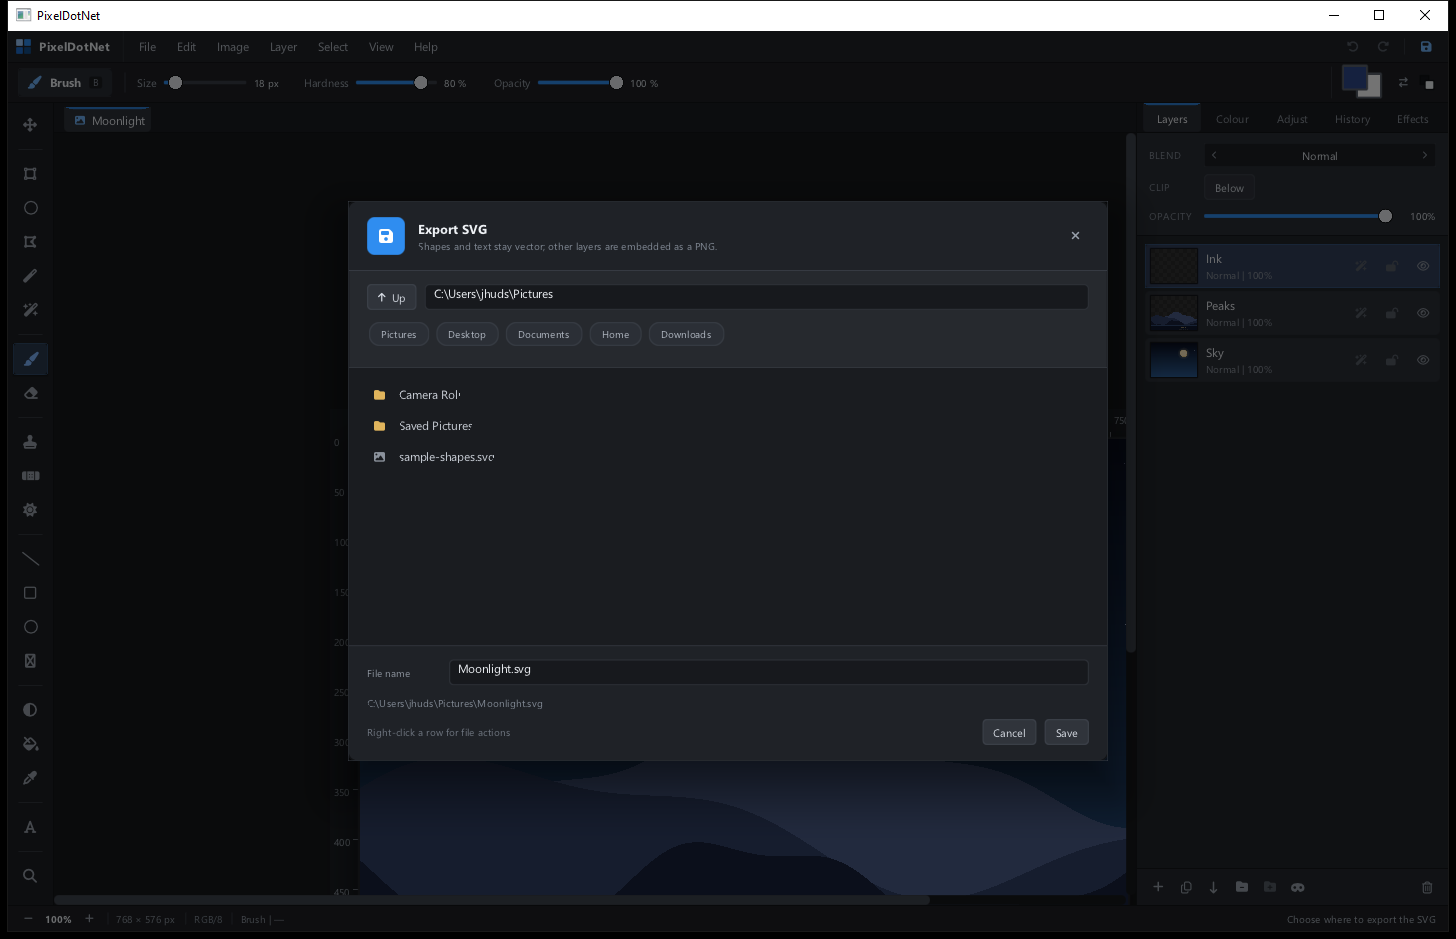
Choose File > Export SVG.... The file browser opens with an .svg name.
- Rectangle, ellipse, line, and path layers are written as real SVG elements.
- Text layers are written as SVG text, including text on a path.
- All other layers are combined into one embedded PNG inside the SVG.
- Layer and group opacity and visibility are respected.
- Open and closed paths keep their geometry.
Outlines are exported as SVG stroke. Text shadows are not represented in SVG because they depend on a raster blur filter. If you need the exact shadow, export a PNG instead.
Keeping your work safe
- Save a project before doing anything destructive, such as flattening or a large resize.
- Use PNG when transparency matters. Use JPEG for photos you plan to share.
- Keep a separate output folder when batch processing, at least until you have checked the results.
- If a layer refuses to paint, check its lock icon and its visibility. The status bar often explains the problem.
- Undo is reliable, but it is not a substitute for saving. It only covers the current session.