Selections and masks
A selection is a stencil. It protects everything outside the stencil and lets your edits reach only the area inside it. This chapter covers every way to make and change a selection, plus masks, guides, and snapping.
What a selection does
When a selection exists, the following actions stay inside it:
- Brush, eraser, line, gradient, and paint bucket strokes
- Clone and healing strokes
- Shapes drawn with the shape tools
- Image adjustments such as brightness, levels, and colour tools
- Effects such as blur, sharpen, and pixelate
- Fills from the Select menu
Selections belong to the whole document, not to one layer. You can make a selection once and then paint on several different layers inside the same area.
A selection is shown as a moving dotted outline, often called marching ants. The moving line itself is never saved in the image.
Making a selection
There are five selection tools. Each one creates the stencil a little differently.
| Tool | Shortcut | Best for | How to use it |
|---|---|---|---|
| Marquee | M | Rectangular areas, boxes, panels | Drag a rectangle. |
| Elliptical Select | Q | Circles and ovals | Drag a bounding box; the ellipse fills it. |
| Lasso | F | Rough organic outlines | Draw around the subject and release. |
| Magic Wand | W | Flat colours and clean edges | Click a colour. Raise or lower tolerance as needed. |
| Quick Selection | A | Cutting out a subject quickly | Paint over the subject. Add or subtract as needed. |
Magic Wand options
- Tolerance decides how different a pixel can be and still match the clicked colour. Low values select only nearly identical colours. High values select a wider range.
- Contiguous keeps the selection to the connected area you clicked. Turn it off to select matching colours everywhere on the layer.
- The wand reads the active layer. If the colour you want is on a different layer, select that layer first, or use Quick Selection, which reads the visible composite.
Quick Selection options
- Size controls the sampling brush. The selection often grows far beyond each dab.
- Tolerance controls how eager the region is to grow. Lower it if the selection leaks into the background.
- Subtract, or holding Alt, removes an area from the selection.
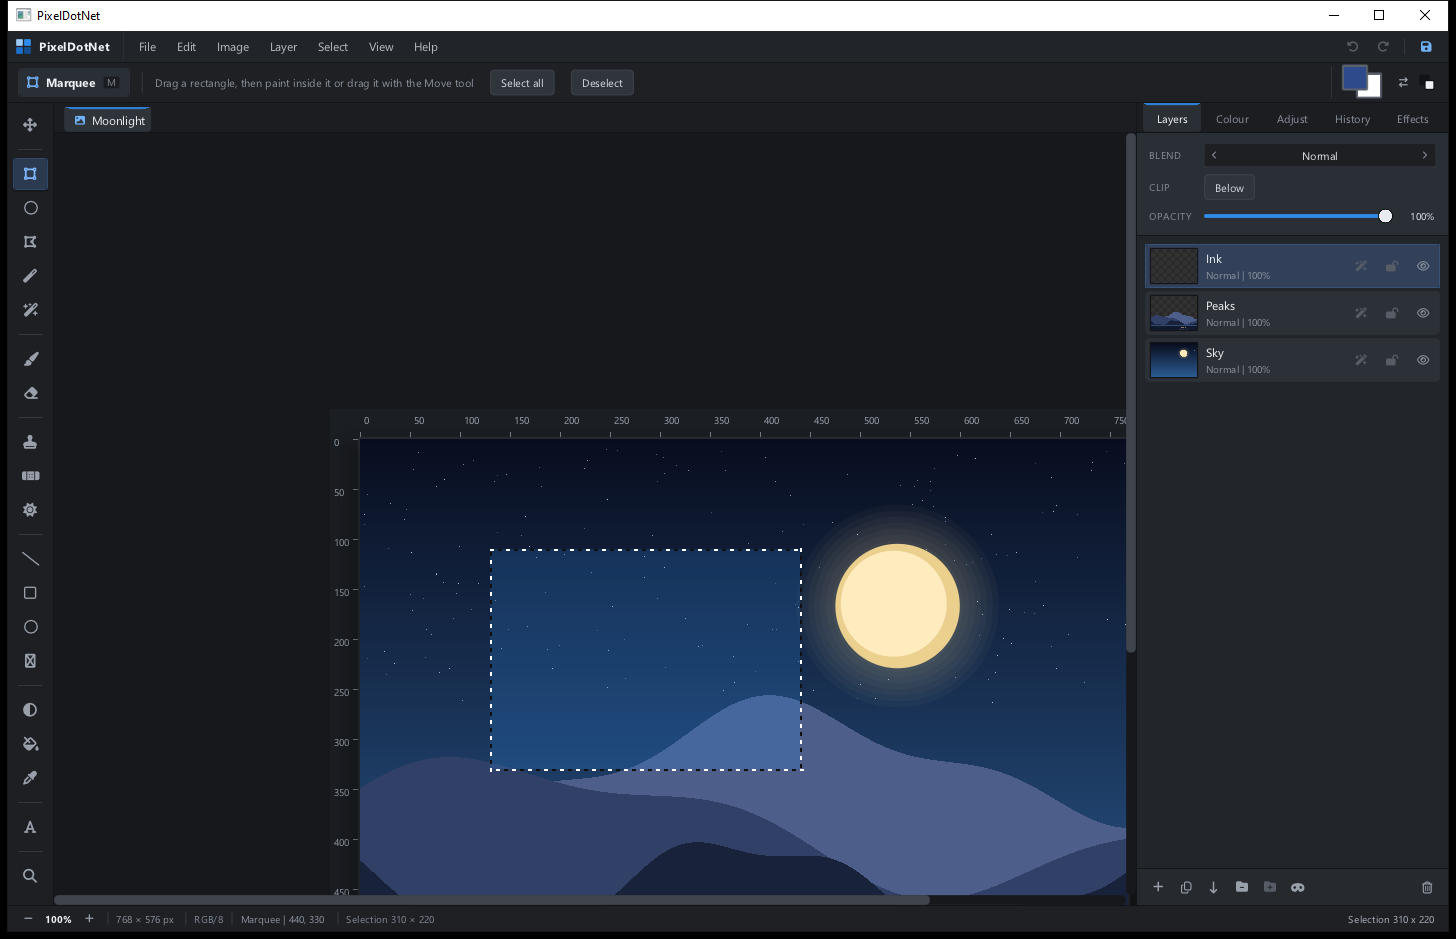
Adding and subtracting
You are not limited to one selection at a time. The modifier keys let you combine shapes:
| Modifier | Result |
|---|---|
| Shift | Add the new area to the current selection. |
| Ctrl | Add the new area to the current selection. |
| Alt | Subtract the new area from the current selection. |
| No modifier | Replace the current selection with the new one. |
The options bar also has selection mode buttons for New, Add, Subtract, and Intersect, so you do not have to remember the keys.
Moving and resizing a selection
Switch to the Move tool with V, then drag inside the selection to move the selected pixels and the selection together. A transparent hole is left behind where the pixels used to be.
- Rectangular and elliptical selections have resize handles. Drag a handle to stretch or shrink the selected pixels.
- Freehand lasso selections can be moved but do not have resize handles.
- Snapping can align the moved selection to guides or canvas edges. Turn it on from View > Toggle Snapping.
Using a selection
Once a selection exists, these commands become useful:
| Command | What it does |
|---|---|
| Select > Select All | Selects the whole document. |
| Select > Deselect or Esc | Clears the selection so edits can reach the whole layer again. |
| Select > Fill with Foreground | Fills the selected area with the foreground colour. |
| Edit > Clear or Del | Erases the selected pixels on the active layer. |
| Edit > Copy / Paste | Copies the selected pixels and pastes them as a new layer. |
| Edit > Copy Merged | Copies the visible result of all layers inside the selection. |
| Edit > Content-Aware Fill | Removes the selected content and reconstructs the area from its surroundings. |
A simple cut-out recipe
- Select the subject with Quick Selection or the Magic Wand.
- Add and subtract until the dotted outline hugs the subject.
- Press Ctrl+C to copy the selected pixels, then Ctrl+V to paste them as a new layer.
- Hide the original layer to check the cut-out against transparency.
- Use a layer mask later if you want to soften or refine the edge.
Layer masks
A layer mask is a reusable stencil attached to one layer. It is often better than a selection because it is non-destructive and can be adjusted at any time.
Think of the mask as a black and white painting:
- White reveals the layer.
- Black hides the layer.
- Grey reveals the layer partially, like a frosted window.
Adding a mask
- Make a selection if you want to start with a shaped mask.
- Click the mask button in the Layers panel, or right-click the layer and choose the mask action.
- Click the mask thumbnail so it has a white border. You are now painting on the mask, not on the layer.
- Paint black with the brush to hide areas, or white to reveal them. Use grey for soft transitions.
Click the layer thumbnail to return to painting on the layer itself. Right-click the mask thumbnail to remove the mask.
Clipping a layer to the one below
Clipping is another kind of stencil. When a layer is clipped to the layer below, it only shows where the lower layer has visible pixels. This is perfect for colouring line art or adding shading to a shape without painting outside its edges.
- Put the artwork you want to use as the boundary on one layer.
- Add a new layer above it and paint freely. It can cover the whole canvas.
- Turn on Clip for the upper layer, or right-click it and choose the clip action.
- The upper layer is now trimmed to the visible content of the layer below.
Clipped layers are marked in the Layers panel and are saved in project files.
Rulers, guides, and snapping
Guides are thin lines you place to line things up. They do not appear in the saved image.
- View > Toggle Rulers shows the rulers around the canvas.
- Drag from the top ruler to create a horizontal guide. Drag from the left ruler to create a vertical guide.
- View > Add Horizontal Guide and Add Vertical Guide place guides at the centre.
- View > Toggle Guides hides or shows all guides.
- View > Toggle Snapping makes moved selections and layers snap to guides and canvas edges.
- View > Clear Guides removes all guides at once.
The grid is a separate aid. View > Toggle Grid draws an eight pixel grid over the canvas. Like guides, it is only a visual aid and is not saved.